

How to make your own homemade race car-themed Christmas ornaments
With a little polymer clay, a race car shaped cookie cutter, and some acrylic paint, you can make your own motorsport ornaments.
The holiday season is the ideal time to get crafty — and if you’re like me, you’re always looking for ways to combine a love of motorsport with your Christmas crafts.
For the past few years, I’ve been making my own at-home race car-shaped Christmas tree ornaments. It’s a fairly simple process, even for someone who isn’t particularly creative — and I’m going to teach you how to do it.
Making your own DIY race car Christmas ornaments
If you’re someone keen on the idea of decorating your Christmas tree with race car ornaments, then I’ve got you covered.
Your list of needed supplies is pretty simple and include:
- Quick-baking modeling clay that can be set in your home oven
- Race car-shaped cookie cutters
- Acrylic paint, spray paint, and/or fine-tipped paint markers
- Paint brushes
- A rolling pin (or wine bottle, or something to roll out the clay)
- A baking sheet
- A toothpick
- String, yarn, or hooks
- Some reference images, if you’re going for detail!
I ordered all of my supplies off Amazon, though most specialty craft stores or other big-box department stores will likely also stock what you need!
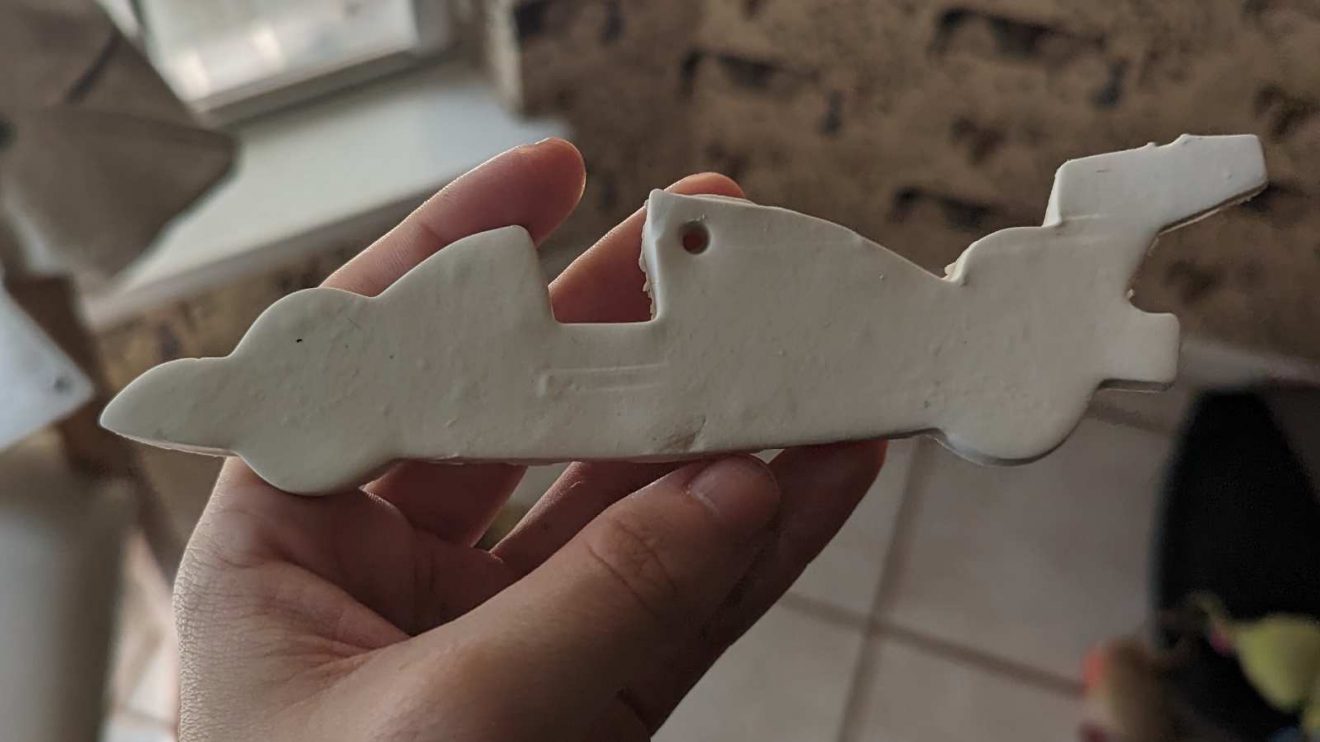
To start, knead your clay for a few minutes; you want it to get fairly pliable and easy to handle. When it’s soft, shape the clay into a disc and roll it out until it’s 1/4-inch (or, just over six millimeters) thick.
After that, use your race car cookie cutter to cut out some shapes! I have a chunky open-wheel cookie cutter, but there are also stock car cookie cutters available online.
Next, use your toothpick to poke a hole somewhere in the ornament; this is where you’ll tie your string, so make sure the hole is somewhere that it can support a roughly equal weight distribution.
After that, pop it on your baking tray and into the oven. Follow the instructions on your clay package here for the temperature and the time.
More on Formula 1’s annual breaks:
? Explained: What is the F1 summer break and why shut down for a month?
? Why F1’s one-off autumn break should become a permanent fixture
When your ornaments have cooked, let them cool completely before you break out your painting supplies.
For this, you can be as detailed as you choose. When I made my first ornaments, I styled them after a Ronnie Peterson March and a François Cevert Tyrrell — though you can make any kind of car you like! You could also make your own creation, or just paint the whole thing one color.
Pro tip: If you’re not a total master at wielding a paint brush, you can also buy some paint pens. A fine-tipped paint pen will work wonders for any fine detailing or letterwork.
If you’re using acrylic paint, your ornament should dry fairly quickly. From there, you just need to add a hook or some string through the hole you poked in the ornament, and voilà: Your own race car ornaments!
If the idea of a car-shaped ornament feels like a lot, then don’t worry — I have a handful of other fairly simple ideas.
First, any round or spherical ornament can make for a great and fairly simple canvas to paint an ornament inspired by the helmet of your favorite racer. Some great, iconic, but simple helmet designs include those from François Cevert, Peter Revson, Ronnie Peterson, Ayrton Senna, Carlos Pace, Elio de Angelis, and so many more!
If you have some model cars laying around, most can be turned into an ornament with the quick addition of some string or a hook.
Those with a 3D printer can whip up some Pirelli slicks for their tree, or create their favorite track.
Or, if you’re looking for something a little more subtle, perhaps consider making your own ornaments shaped or painted like other racing-related items, such a podium champagne, different colored flags, a honey badger (for the Daniel Ricciardo fans), and more.
Read next: F1 2024 reader awards: Hamilton, Perez and Norris among the winners